
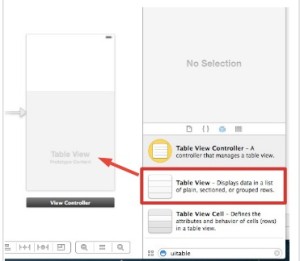
1.storyboad上で、TableViewをドラッグ&ドロップする。
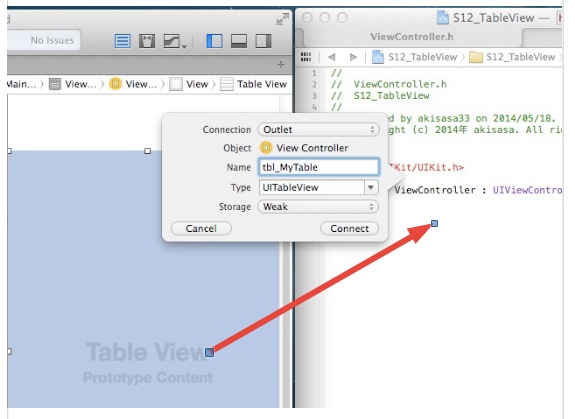
2.ViewController.hにTableViewのpropertyを追加する。property名はtbl_MyTableにした。
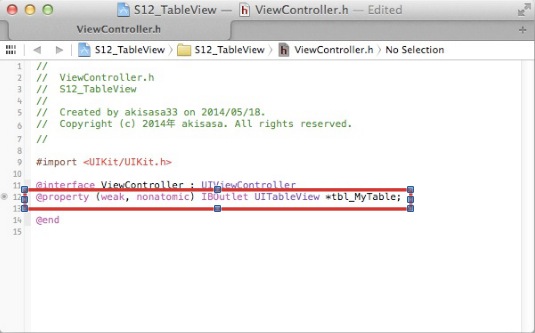
3.UIViewControllerに<UITableViewDelegate, UITableViewDataSource>デリゲートを追加。
#import <UIKit/UIKit.h>

@interface ViewController : UIViewController<UITableViewDelegate, UITableViewDataSource>
@property (weak, nonatomic) IBOutlet UITableView *tbl_MyTable;

@end
4.警告が2つでる。UITableViewDataSourceの@requiredが2つある為。 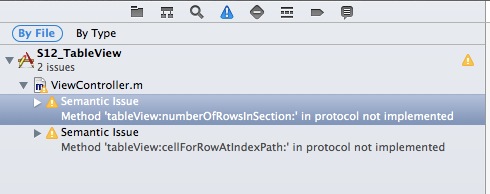
↓当該メソッドは、この2つ。
– (NSInteger)tableView:(UITableView *)tableView numberOfRowsInSection:(NSInteger)section; →テーブルの件数を返すメソッド。 – (UITableViewCell *)tableView:(UITableView *)tableView cellForRowAtIndexPath:(NSIndexPath *)indexPath; →テーブルの各セルオブジェクトを返すメソッド。
5.当該@requiredメソッドを2つViewController.mに追加する。処理内容は一旦、仮で記述。
- (NSInteger)tableView:(UITableView *)tableView numberOfRowsInSection:(NSInteger)section
{

return 0;

}

- (UITableViewCell *)tableView:(UITableView *)tableView cellForRowAtIndexPath:(NSIndexPath *)indexPath;
{

return nil;

}
6.テーブルデータを格納するdataSource(property)を定義する。
@property (nonatomic, strong) NSArray *dataSource; // テーブルデータを格納する
7.デリゲート指定、及びdataSourceの値を設定する。
- (void)viewDidLoad
{
    [super viewDidLoad];
    // Do any additional setup after loading the view, typically from a nib.

    /* UITableViewDelegate、dataSourceのデリゲートを指定 */
    self.tbl_MyTable.delegate = self;
    self.tbl_MyTable.dataSource = self;

    self.dataSource = @[@"1行目", @"2行目",@"3行目"]; // テーブルデータを設定
}
8.先ほどのnumberOfRowsInSection、cellForRowAtIndexPathを実装する。
- (NSInteger)tableView:(UITableView *)tableView numberOfRowsInSection:(NSInteger)section
{

    return self.dataSource.count;
}

- (UITableViewCell *)tableView:(UITableView *)tableView cellForRowAtIndexPath:(NSIndexPath *)indexPath;
{
    static NSString *CellIdentifier = @"cell"; // CellのIDをつける(意味がわかりませんが、なにコレ??。)

    // Cellを取得
    UITableViewCell *cell = [tableView dequeueReusableCellWithIdentifier:CellIdentifier];

    // ↓Cellが存在しない場合は、Cellを生成(??? 最初から作ればいいじゃん?)
    if (!cell) {

        cell = [[UITableViewCell alloc] initWithStyle:UITableViewCellStyleDefault
                                      reuseIdentifier:CellIdentifier];
    }

    // CellにdataSourceの値を設定
    cell.textLabel.text = self.dataSource[indexPath.row];

    return cell;
}
↓実行結果
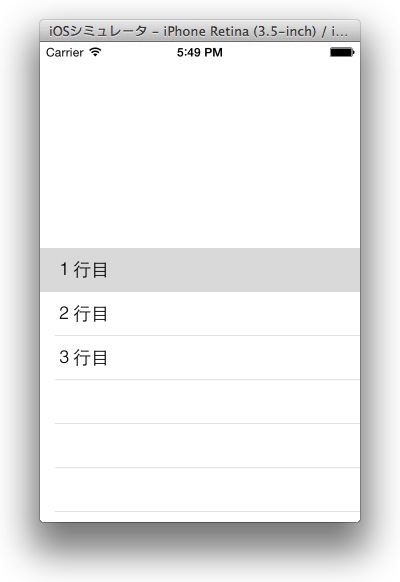
おわり。
応援嬉しいです^^


画面にオブジェクトを配置")
新規プロジェクトの作成")
")
初めてiOSシミュレータを起動するさいは、Macを開発モードにする。")
Navigation Barの追加方法")
3Fzardry(その8)Spiritというか蛍みたいなものの動き修正")
3Fzardry(その7)Spiritというか蛍みたいなものを追加")
3Fzardry(その6)Tilemapとカメラ移動")


")


3Fzardry(その5)Spineやめて、Anima2Dを使う")

MagicaVoxelでロボット描いてみた")


 ダイアログの表示 JQueryを利用!")

誕生。意味わかりまてん。")


コメント
コメントはありません。